Tutorial
Introduction
This tutorial will go through process of building a simple admin panel for a CMS-like application.
Step by step, you're going to learn how to consume a REST API and add basic CRUD functionality to your panel leveraging the unique capabilities of refine.
Let's begin by setting up a new refine project.
Setting up
There are two alternative methods to set up a refine application.
The recommended way is using the superplate tool. superplate's CLI wizard will let you create and customize your application in seconds.
Alternatively, you may use the create-react-app tool to create an empty React application and then add refine module via npm.
- use superplate
- use create-react-app
First, run the create-react-app tool to bootstrap an empty React project.
npx create-react-app tutorial --template typescript
--template typescript flag will ensure that the Typescript language is selected.
Navigate to the project folder and install refine with the following npm command:
- use npm
- use yarn
npm i @pankod/refine @pankod/refine-react-router
yarn add @pankod/refine @pankod/refine-react-router
This tutorial assumes your project is configured for absolute imports. Since CRA does not configure it by default, you should configure it yourself to be able to use absolute imports. You should configure a tsconfig.json with baseUrl setting pointing to the /src directory in your project.
Refer to CRA docs for more information about absolute imports. →
First, run the superplate with the following command:
npx superplate-cli -p refine-react tutorial
Select the following options to complete the CLI wizard:
? Select your project type:
❯ refine-react

? What will be the name of your app:
tutorial

? Package manager:
❯ Npm

? Do you want to customize the theme?:
❯ No (Ant Design default theme)

? Data Provider :
❯ REST API

? Auth Provider :
❯ None

? Do you want to add an example page?:
❯ No

? i18n - Internationalization:
❯ No
About Fake REST API
refine is designed to consume data from APIs.
For the sake of this tutorial, we will provide you a fully working, fake REST API located at https://api.fake-rest.refine.dev/. You may take a look at available resources and routes of the API before proceeding to the next step.
Using a Dataprovider
Dataproviders are refine components making it possible to consume different API's and data services conveniently. To consume our Fake REST API, we'll use the "Simple REST Dataprovider".
Next, navigate to the project folder and run the following command to install the required package:
- use npm
- use yarn
npm i @pankod/refine-simple-rest
yarn add @pankod/refine-simple-rest
If you used superplate to bootstrap the project, you can skip issuing this command as superplate already installs the selected data provider.
Fake REST API is based on JSON Server Project. Simple REST Dataprovider is fully compatible with the REST rules and methods of the JSON Server.
refine includes many out-of-the-box data providers to use in your projects like
- Simple REST API
- GraphQL
- NestJS CRUD
- Airtable
- Strapi - Strapi v4
- Strapi GraphQL
- Supabase
- Hasura
- Appwrite
- Altogic
Community ❤️
Refer to the dataProvider documentation for detailed usage. →
Bootstrapping the Application
Replace the contents of App.tsx with the following code:
import { Refine } from "@pankod/refine";
import routerProvider from "@pankod/refine-react-router";
import dataProvider from "@pankod/refine-simple-rest";

import "@pankod/refine/dist/styles.min.css";

const App: React.FC = () => {
    return (
        <Refine
            routerProvider={routerProvider}
            dataProvider={dataProvider("https://api.fake-rest.refine.dev")}
        />
    );
};

export default App;
<Refine/> is the root component of a refine application. Using the dataProvider prop, we made our Simple REST Dataprovider available to the entire application.
Run the following command to install the required package:
- with superplate
- with create-react-app
npm run dev
npm run start
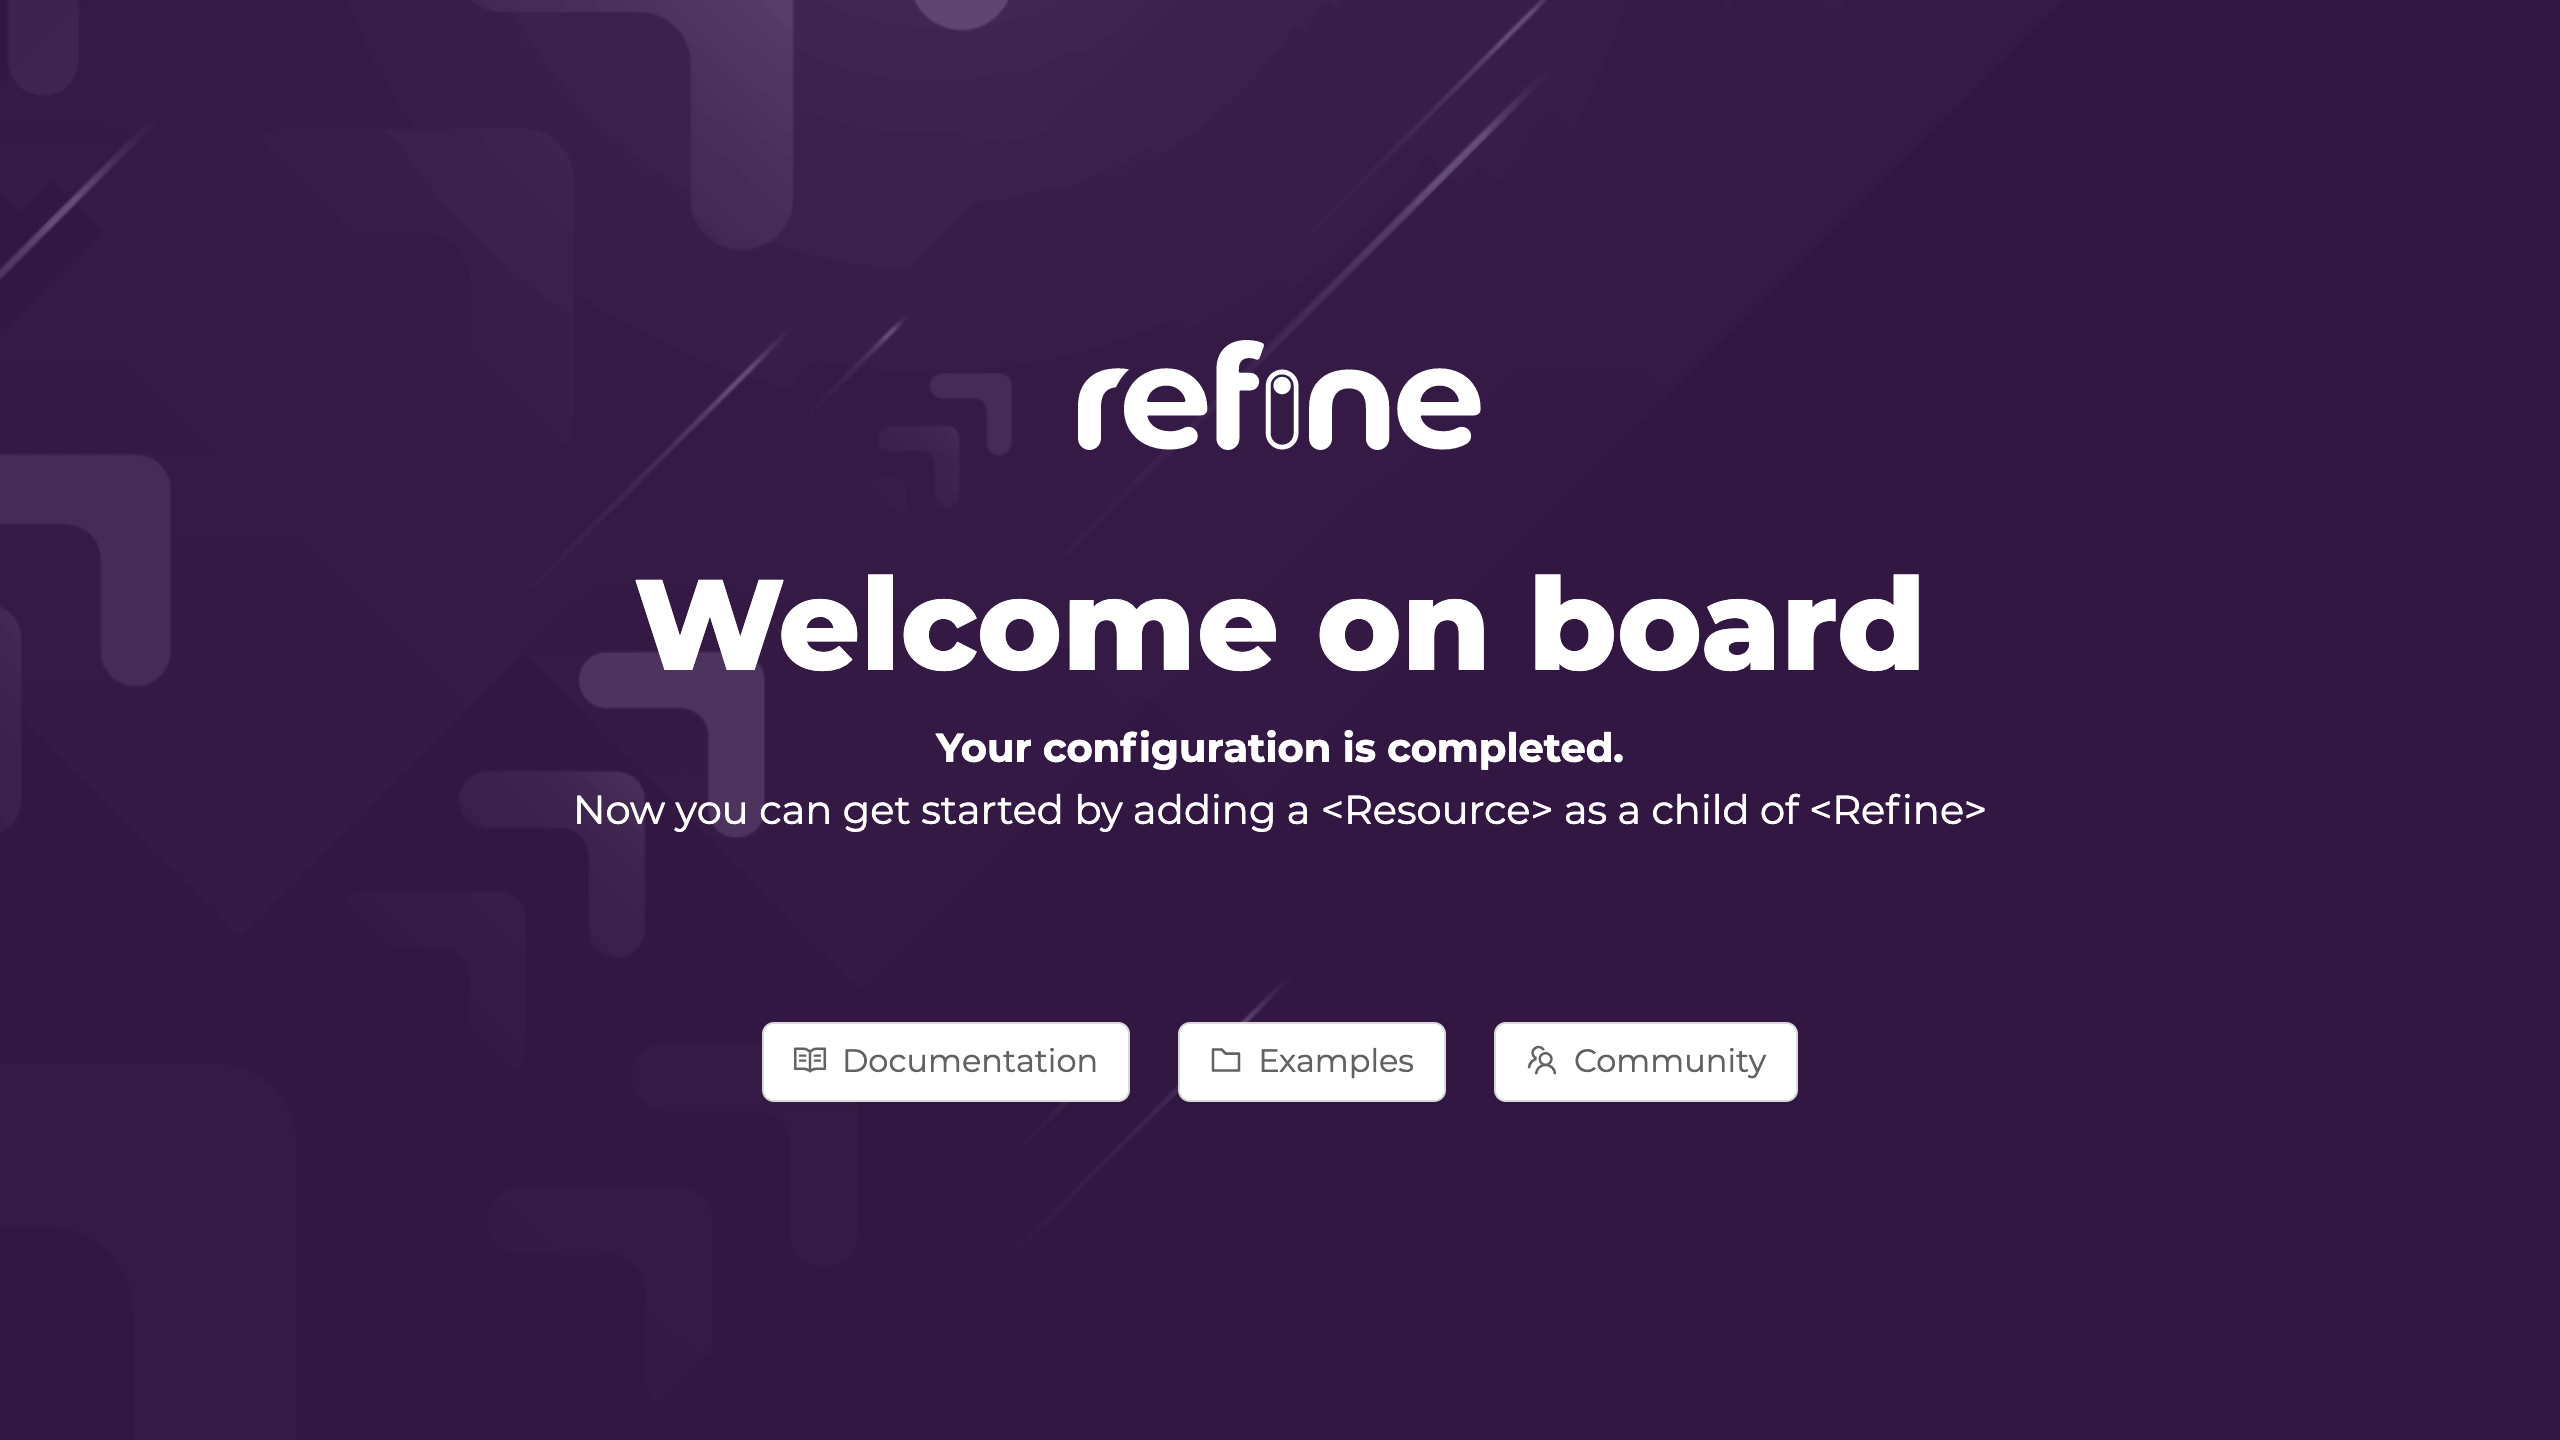
Your refine application should be up and running!
Point your browser to http://localhost:3000 to access it. You will see the welcome page.
Adding Resources
Now we are ready to start connecting to our API by adding a resource to our application.
Let's add /posts/ endpoint from our API as a resource. First take a look to the raw API response for the request made to the /posts/ route:
Show response
[
  {
    "id": 1,
    "title": "Eius ea autem sapiente placeat fuga voluptas quos quae.",
    "slug": "beatae-esse-dolor",
    "content": "Explicabo nihil delectus. Nam aliquid sunt numquam...",
    "category": {
      "id": 24
    },
    "user": {
      "id": 7
    },
    "status": "draft",
    "createdAt": "2021-03-13T03:09:30.186Z",
    "image": [],
    "tags": [
      7,
      4
    ],
    "language": 2
  },
  ...
]
Now, add the highlighted code to your App.tsx to connect to the endpoint.
import { Refine } from "@pankod/refine";
import routerProvider from "@pankod/refine-react-router";
import dataProvider from "@pankod/refine-simple-rest";

export const App: React.FC = () => {
    return (
        <Refine
            routerProvider={routerProvider}
            dataProvider={dataProvider("https://api.fake-rest.refine.dev")}
            resources={[{ name: "posts" }]}
        />
    );
};
resources is a property of <Refine/> representing API Endpoints. The name property of every single resource should match one of the endpoints in your API!
Instead of showing the welcome page, the application should redirect now? to an URL defined by the name property. Open your application to check that the URL is routed to /posts:
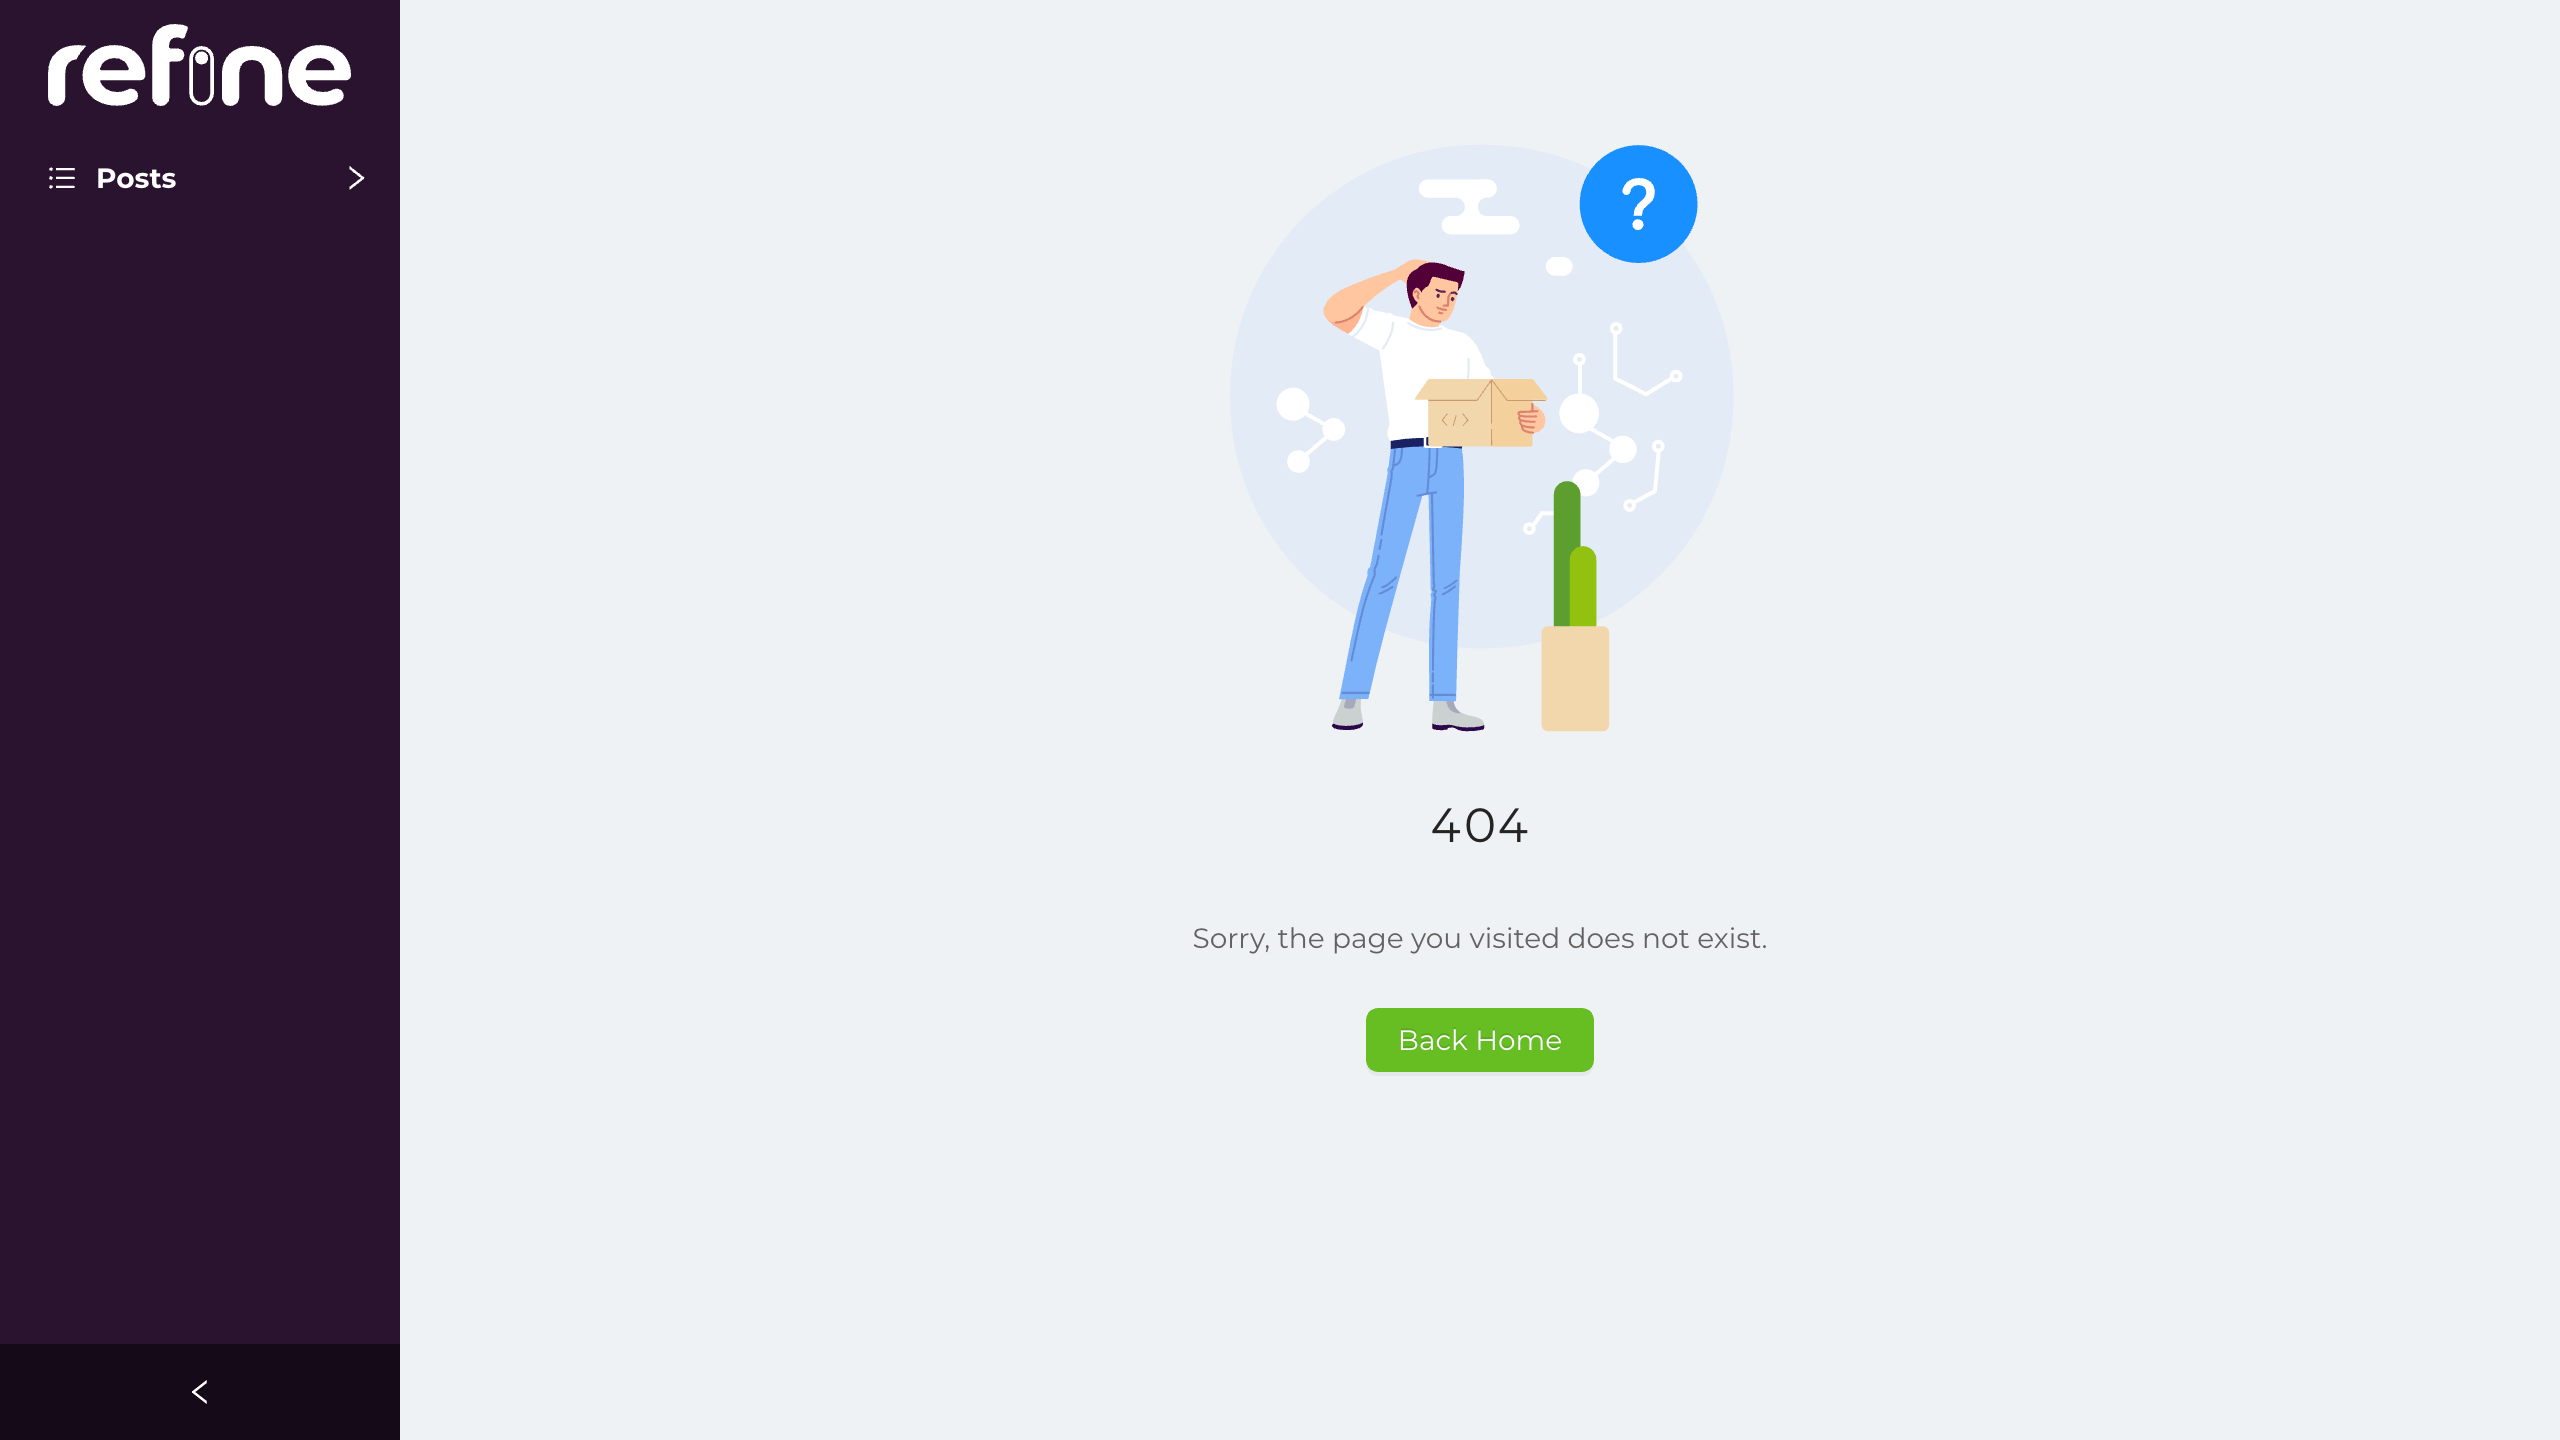
You'll still see a 404 error page because no Page component is assigned to our resource yet.
resources use Page components to handle data and perform rendering. Page components are passed to resources as an array of objects.
For basic CRUD operations, there are four predefined props: list, create, edit and show.
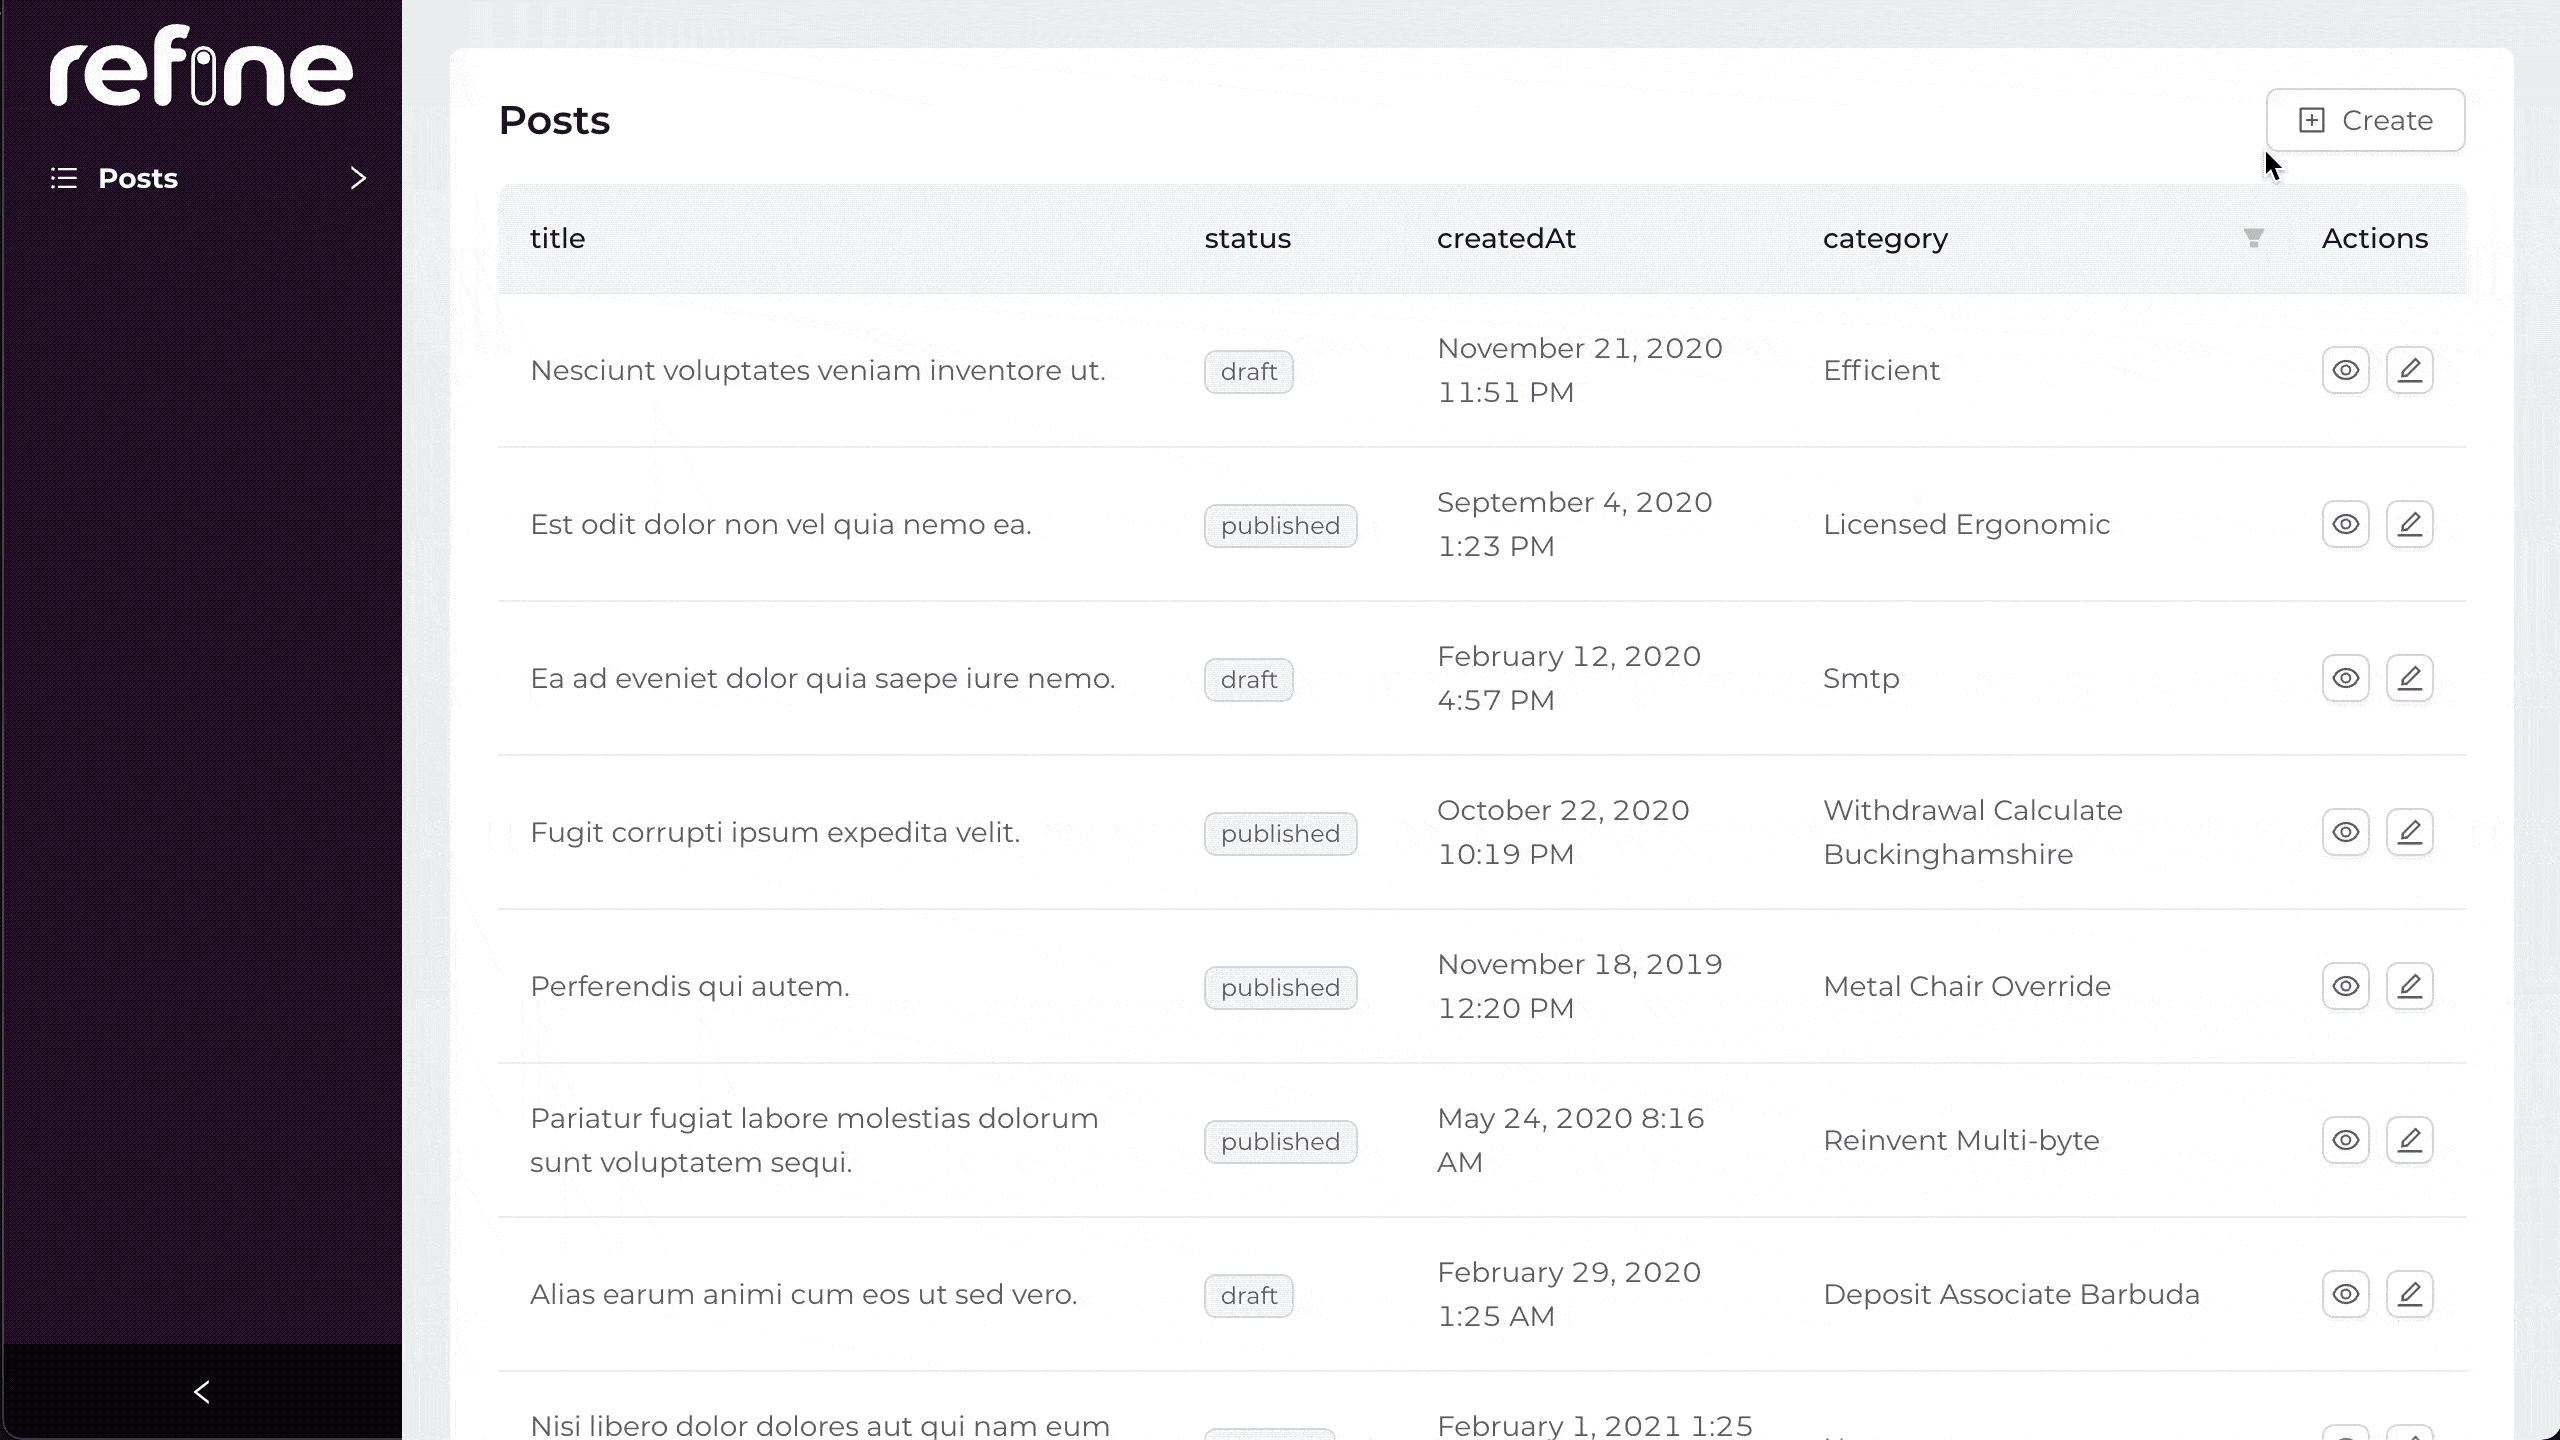
Let's create a Page component to fetch posts and display them as a table. Later, we will pass the component as the list prop to our resource.
Creating a List Page
First, we'll need an interface to work with the data from the API endpoint.
Create a new folder named "interface" under "/src" if you don't already have one. Then create a "index.d.ts" file with the following code:
export interface IPost {
    id: string;
    title: string;
    status: "published" | "draft" | "rejected";
    createdAt: string;
}
We'll be using title, status and createdAt fields of every post record.
Now, create a new folder named "pages/posts" under "/src". Under that folder, create a "list.tsx" file with the following code:
import {
    List,
    TextField,
    TagField,
    DateField,
    Table,
    useTable,
} from "@pankod/refine";

import { IPost } from "interfaces";

export const PostList: React.FC = () => {
    const { tableProps } = useTable<IPost>();
    return (
        <List>
            <Table {...tableProps} rowKey="id">
                <Table.Column dataIndex="title" title="title" />
                <Table.Column
                    dataIndex="status"
                    title="status"
                    render={(value) => <TagField value={value} />}
                />
                <Table.Column
                    dataIndex="createdAt"
                    title="createdAt"
                    render={(value) => <DateField format="LLL" value={value} />}
                />
            </Table>
        </List>
    );
};
Let's break down the <PostList/> component to understand what's going on here:
✳️ <Table/> is a native Ant Design component. It renders records row by row as a table.
<Table/> expects a rowKey prop as the unique key of the records.
refine uses Ant Design components to render data.
You may refer to Ant Design Docs for further information about the <Table/> component.
✳️ useTable<IPost>(); is passed to the <Table/> component as {...tableProps}.
This is the point where the ✨real magic✨ happens!
refine hook useTable() fetches data from API and wraps them with various helper hooks required for the <Table/> component. Data interaction functions like sorting, filtering, and pagination will be instantly available on the <Table/> with this single line of code.
refine depends heavily on hooks and useTable() is only one among many others.
On useTable() Documentation you may find more information about the usage of this hook.
✳️ <Table.Column> components are used for mapping and formatting each field shown on the <Table/>. dataIndex prop maps the field to a matching key from the API response. render prop is used to choose the appropriate Field component for the given data type.
The example uses <TagField> and <DateField> components. To get the full list of available components, you may refer to the Field Components Documentation.
✳️ <List> is a refine component. It acts as a wrapper to <Table> to add some extras like Create Button and title.
Finally, we are ready to add <PostList> to our resource. Add the highlighted line to your App.tsx
import { Refine } from "@pankod/refine";
import routerProvider from "@pankod/refine-react-router";
import dataProvider from "@pankod/refine-simple-rest";

import { PostList } from "./pages/posts";

export const App: React.FC = () => {
    return (
        <Refine
            routerProvider={routerProvider}
            dataProvider={dataProvider("https://api.fake-rest.refine.dev")}
            resources={[{ name: "posts", list: PostList }]}
        />
    );
};
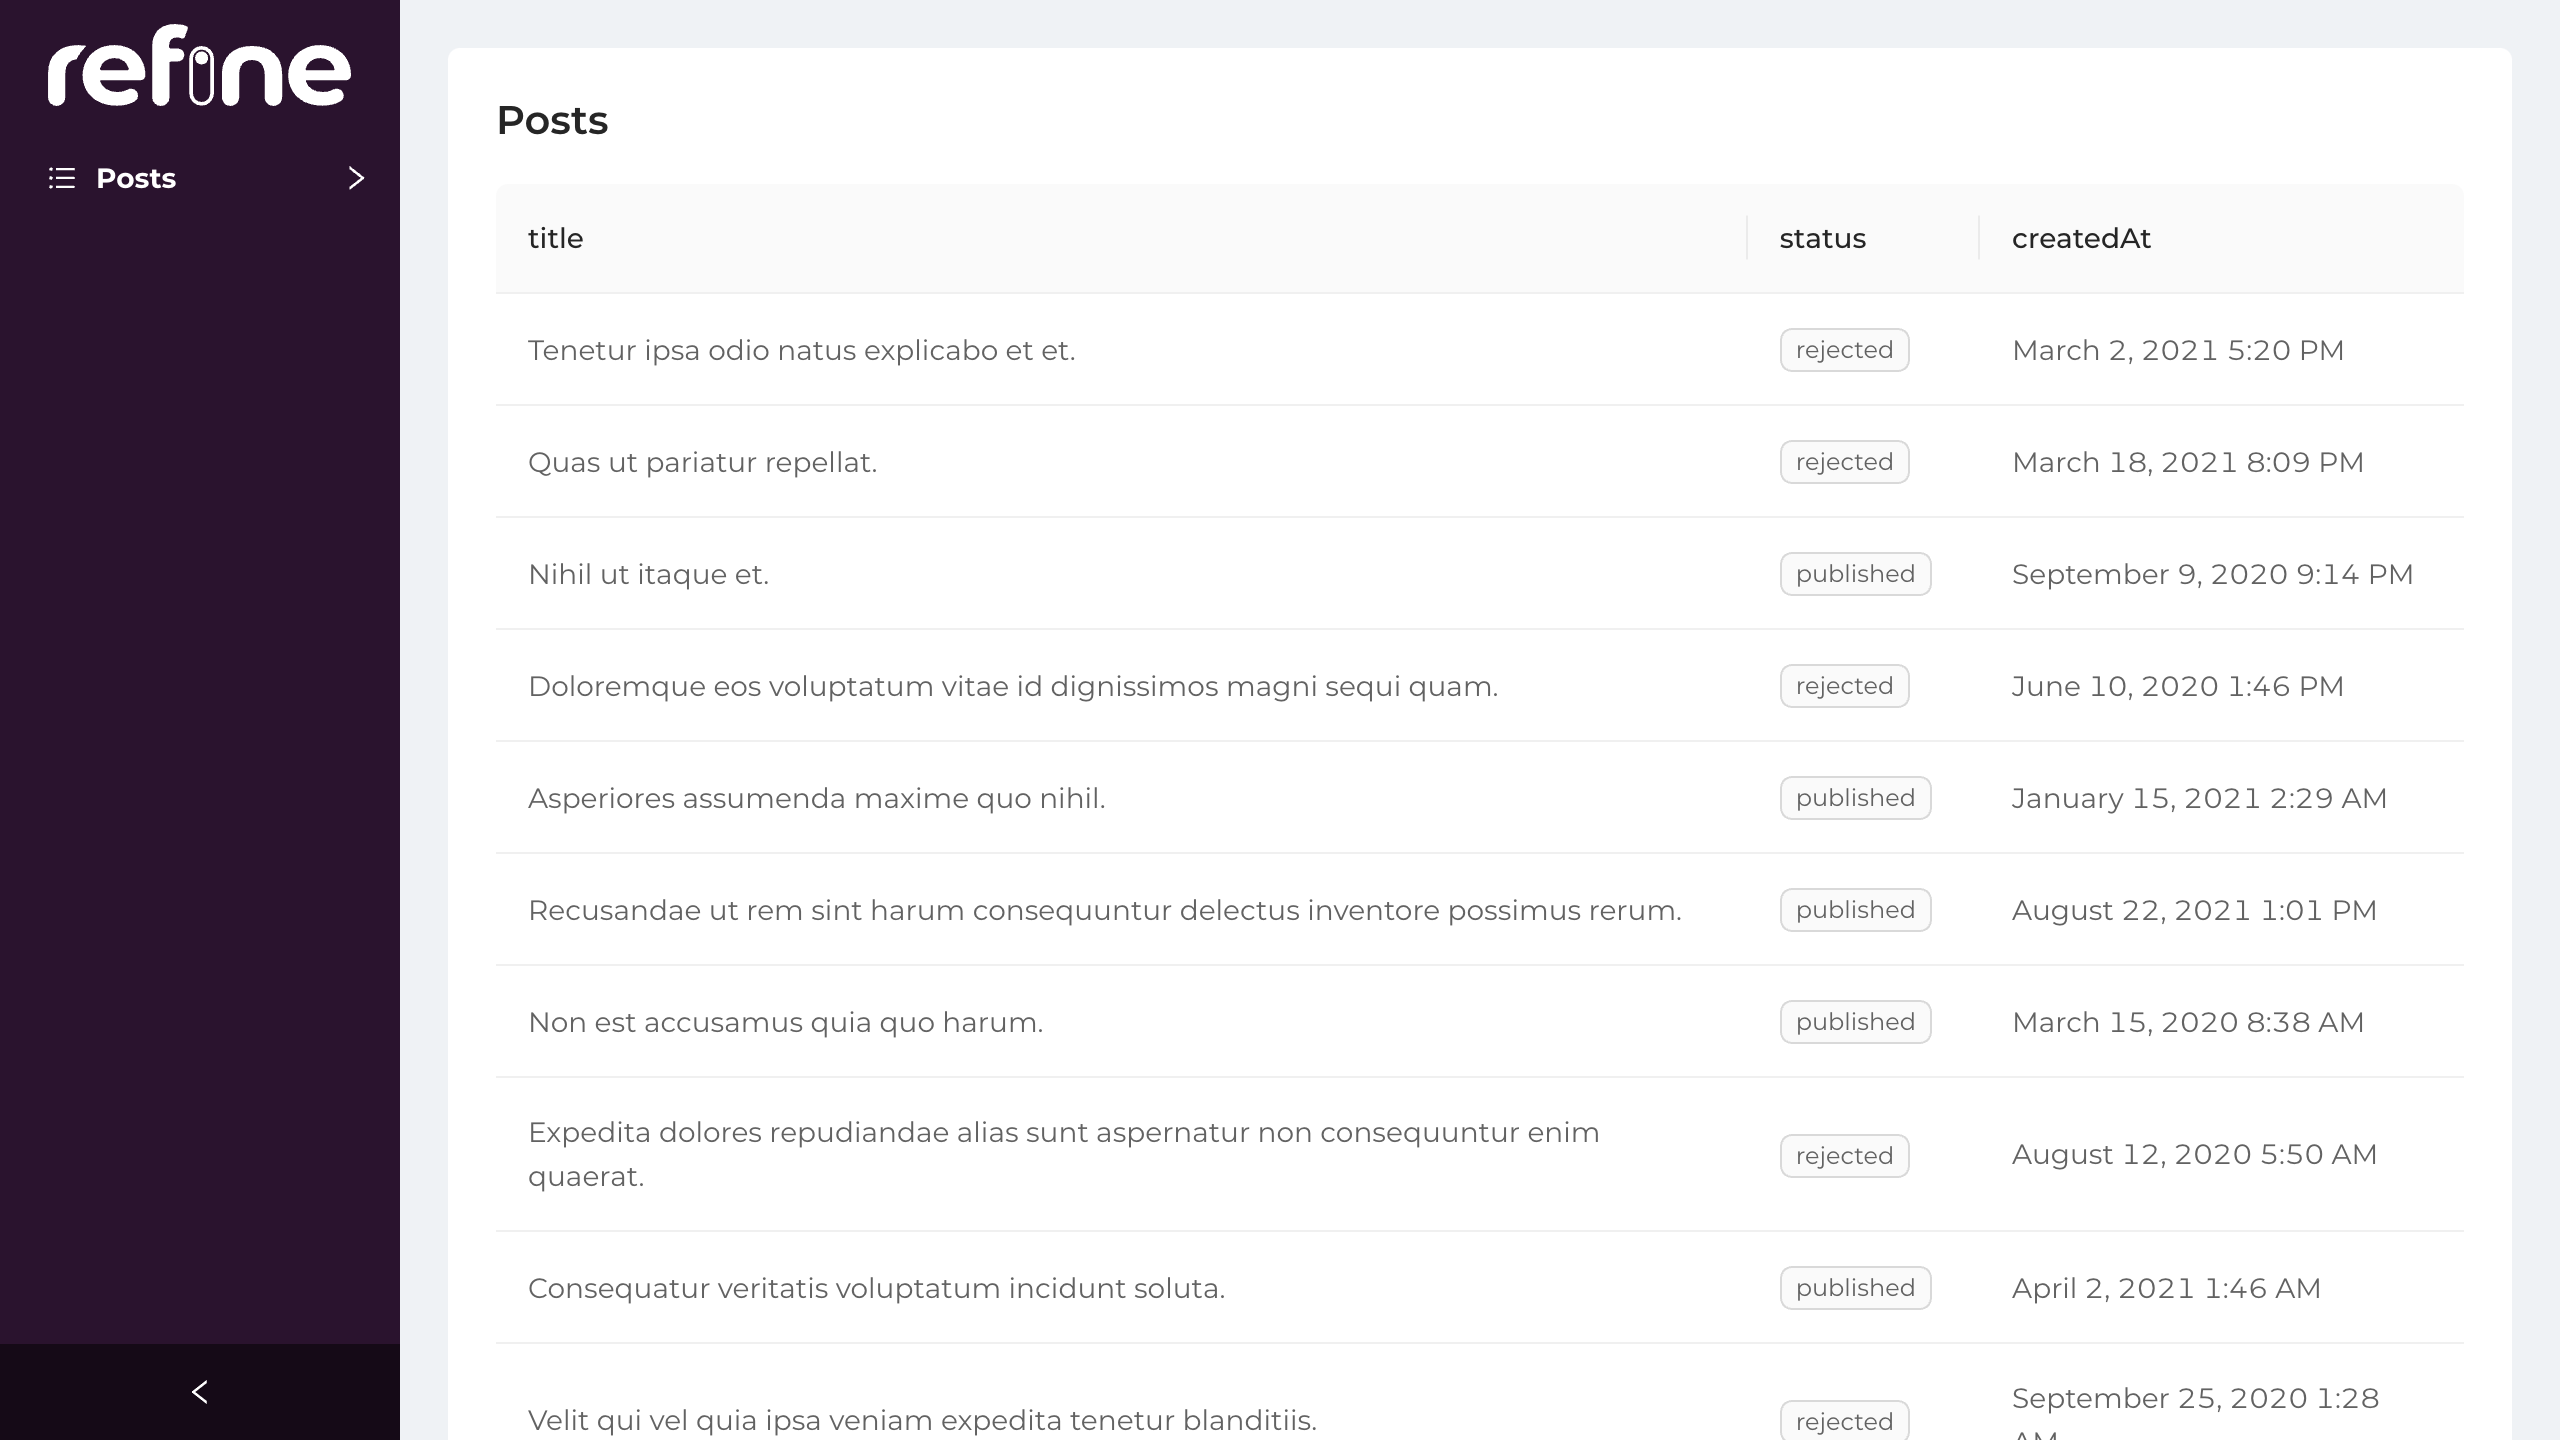
Open your application in your browser. You will see posts are displayed correctly in a table structure and even the pagination works out-of-the box.
On the next step, we are going to add a category field to the table which involves handling data relationships.
Handling relationships
Remember the records from /posts endpoint that had a category id field?
...
  "category": {
    "id": 26
  }
...
To display category titles on our table, we first need to map category id's to their corresponding titles.
The category title data can be obtained from the /categories endpoint for each record.
  {
    "id": 26,
    "title": "mock category title",
  }
At this point, we need to join records from different resources. For this, we're goint to use the refine hook useMany.
Before we start, just edit our interface for the new ICategory type:
export interface ICategory {
    id: string;
    title: string;
}

export interface IPost {
    id: string;
    title: string;
    status: "published" | "draft" | "rejected";
    category: { id: string };
    createdAt: string;
}
So we can update our list.tsx with the highlighted lines:
import {
    List,
    TextField,
    TagField,
    DateField,
    Table,
    useTable,
    useMany,
} from "@pankod/refine";

import { IPost, ICategory } from "interfaces";

export const PostList: React.FC = () => {
    const { tableProps } = useTable<IPost>();

    const categoryIds =
        tableProps?.dataSource?.map((item) => item.category.id) ?? [];
    const { data: categoriesData, isLoading } = useMany<ICategory>({
        resource: "categories",
        ids: categoryIds,
        queryOptions: {
            enabled: categoryIds.length > 0,
        },
    });

    return (
        <List>
            <Table {...tableProps} rowKey="id">
                <Table.Column dataIndex="title" title="title" />
                <Table.Column
                    dataIndex="status"
                    title="status"
                    render={(value) => <TagField value={value} />}
                />
                <Table.Column
                    dataIndex="createdAt"
                    title="createdAt"
                    render={(value) => <DateField format="LLL" value={value} />}
                />
                <Table.Column
                    dataIndex={["category", "id"]}
                    title="category"
                    render={(value) => {
                        if (isLoading) {
                            return <TextField value="Loading..." />;
                        }

                        return (
                            <TextField
                                value={
                                    categoriesData?.data.find(
                                        (item) => item.id === value,
                                    )?.title
                                }
                            />
                        );
                    }}
                />
            </Table>
        </List>
    );
};
We construct an array of categoryId's from /posts endpoint and pass it to the useMany hook. categoriesData will be filled with id-title tuples to be used for rendering our component.
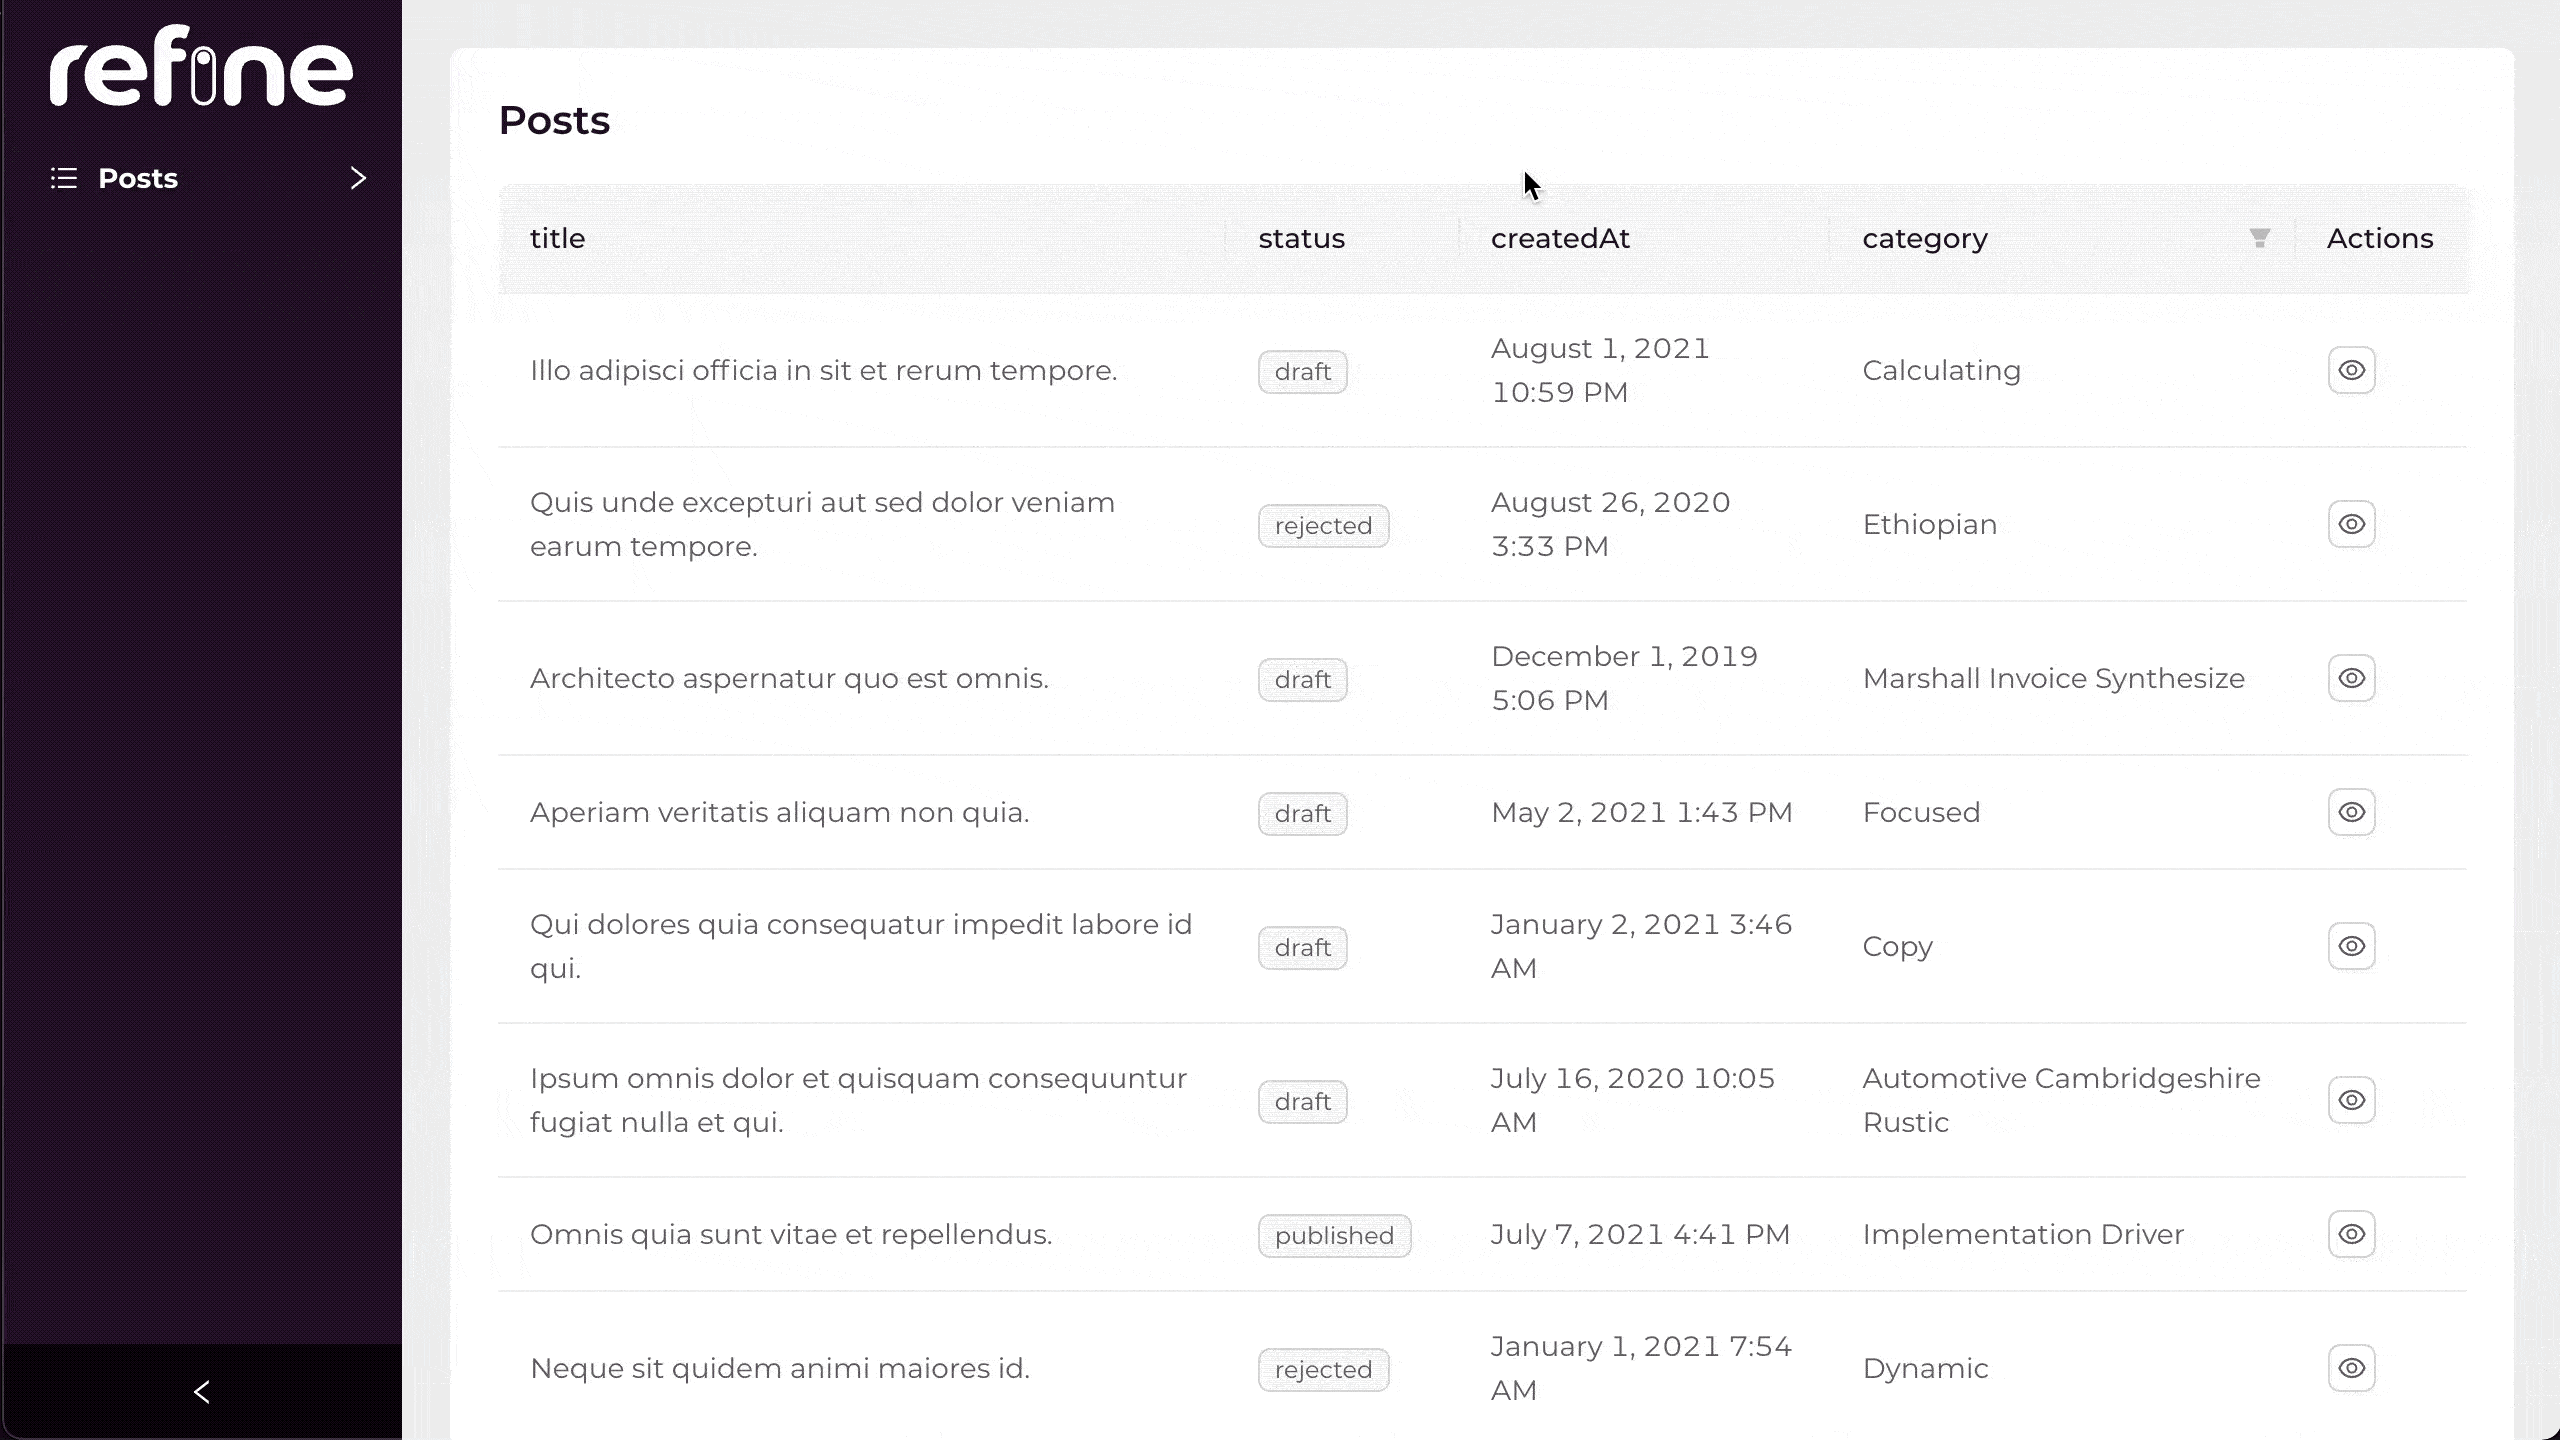
Try the result on your browser and you'll notice that the category column is filled correctly with the matching category titles for the each record's category id's. Even the loading state is managed by refine.
You can access nested properties of table data by using an array:
dataIndex={["category", "id"]}
enabled: categoryIds.length > 0;
Here, we set a condition to start fetching only when data is available.
To get more detailed information about this hook, please refer the useMany Documentation.
Adding search and filters
We're done with displaying post records on our <Table>. Let's add search and filtering capabilities to the component, so that the user can have more control over the data.
We are going to use <Table.Column>'s filterDropdown property and <FilterDropdown> component as following:
import {
    List,
    TextField,
    TagField,
    DateField,
    Table,
    useTable,
    useMany,
    FilterDropdown,
    Select,
    useSelect,
} from "@pankod/refine";

import { IPost, ICategory } from "interfaces";

export const PostList: React.FC = () => {
    const { tableProps } = useTable<IPost>();

    const categoryIds =
        tableProps?.dataSource?.map((item) => item.category.id) ?? [];
    const { data: categoriesData, isLoading } = useMany<ICategory>({
        resource: "categories",
        ids: categoryIds,
        queryOptions: {
            enabled: categoryIds.length > 0,
        },
    });
    const { selectProps: categorySelectProps } = useSelect<ICategory>({
        resource: "categories",
    });

    return (
        <List>
            <Table {...tableProps} rowKey="id">
                <Table.Column dataIndex="title" title="title" />
                <Table.Column
                    dataIndex="status"
                    title="status"
                    render={(value) => <TagField value={value} />}
                />
                <Table.Column
                    dataIndex="createdAt"
                    title="createdAt"
                    render={(value) => <DateField format="LLL" value={value} />}
                />
                <Table.Column
                    dataIndex={["category", "id"]}
                    title="category"
                    render={(value) => {
                        if (isLoading) {
                            return <TextField value="Loading..." />;
                        }

                        return (
                            <TextField
                                value={
                                    categoriesData?.data.find(
                                        (item) => item.id === value,
                                    )?.title
                                }
                            />
                        );
                    }}
                    filterDropdown={(props) => (
                        <FilterDropdown {...props}>
                            <Select
                                style={{ minWidth: 200 }}
                                mode="multiple"
                                placeholder="Select Category"
                                {...categorySelectProps}
                            />
                        </FilterDropdown>
                    )}
                />
            </Table>
        </List>
    );
};
✳️ <FilterDropdown> component serves as a bridge between its child input and refine's useTable hook. It passes childs input value to useTable using filterDropdown's embedded props and provides a filter button.
Refer to the <FilterDropdown> documentation for detailed usage. →
✳️ useSelect hook populates props for <Select> component from a given resource.
Refer to the Select documentation for detailed usage information. →
Refer to the useSelect documentation for detailed usage information. →
defaultValue is used to get the value for the current item. It's not affected by search, sort and filter parameters.
Showing a single record
At this point we are able to list all post records on the table component with pagination, sorting and filtering functionality. Next, we are going to add a details page to fetch and display data from a single record.
Let's create a <PostShow> component on /pages/posts folder:
import { Show, useShow, Typography, Tag, useOne } from "@pankod/refine";
import { IPost, ICategory } from "interfaces";

const { Title, Text } = Typography;

export const PostShow = () => {
    const { queryResult } = useShow();
    const { data, isLoading } = queryResult;
    const record = data?.data;

    const { data: categoryData } = useOne<ICategory>({
        resource: "categories",
        id: record?.category.id || "",
        queryOptions: {
            enabled: !!record?.category.id,
        },
    });

    return (
        <Show isLoading={isLoading}>
            <Title level={5}>Title</Title>
            <Text>{record?.title}</Text>

            <Title level={5}>Status</Title>
            <Text>
                <Tag>{record?.status}</Tag>
            </Text>

            <Title level={5}>Category</Title>
            <Text>{categoryData?.data.title}</Text>
        </Show>
    );
};
Now we can add the newly created component to our resource with show prop:
import { Refine } from "@pankod/refine";
import routerProvider from "@pankod/refine-react-router";
import dataProvider from "@pankod/refine-simple-rest";

import { PostList, PostShow } from "./pages/posts";

export const App: React.FC = () => {
    return (
        <Refine
            routerProvider={routerProvider}
            dataProvider={dataProvider("https://api.fake-rest.refine.dev")}
            resources={[
                {
                    name: "posts",
                    list: PostList,
                    show: PostShow,
                },
            ]}
        />
    );
};
And then we can add a <ShowButton> on the list page to make it possible for users to navigate to detail pages:
import {
    List,
    TextField,
    TagField,
    DateField,
    Table,
    useTable,
    useMany,
    FilterDropdown,
    Select,
    ShowButton,
    useSelect,
} from "@pankod/refine";

import { IPost, ICategory } from "interfaces";

export const PostList: React.FC = () => {
    const { tableProps } = useTable<IPost>();

    const categoryIds =
        tableProps?.dataSource?.map((item) => item.category.id) ?? [];
    const { data: categoriesData, isLoading } = useMany<ICategory>({
        resource: "categories",
        ids: categoryIds,
        queryOptions: {
            enabled: categoryIds.length > 0,
        },
    });

    const { selectProps: categorySelectProps } = useSelect<ICategory>({
        resource: "categories",
    });

    return (
        <List>
            <Table {...tableProps} rowKey="id">
                <Table.Column dataIndex="title" title="title" />
                <Table.Column
                    dataIndex="status"
                    title="status"
                    render={(value) => <TagField value={value} />}
                />
                <Table.Column
                    dataIndex="createdAt"
                    title="createdAt"
                    render={(value) => <DateField format="LLL" value={value} />}
                />
                <Table.Column
                    dataIndex={["category", "id"]}
                    title="category"
                    render={(value) => {
                        if (isLoading) {
                            return <TextField value="Loading..." />;
                        }

                        return (
                            <TextField
                                value={
                                    categoriesData?.data.find(
                                        (item) => item.id === value,
                                    )?.title
                                }
                            />
                        );
                    }}
                    filterDropdown={(props) => (
                        <FilterDropdown {...props}>
                            <Select
                                style={{ minWidth: 200 }}
                                mode="multiple"
                                placeholder="Select Category"
                                {...categorySelectProps}
                            />
                        </FilterDropdown>
                    )}
                />
                <Table.Column<IPost>
                    title="Actions"
                    dataIndex="actions"
                    render={(_text, record): React.ReactNode => {
                        return (
                            <ShowButton
                                size="small"
                                recordItemId={record.id}
                                hideText
                            />
                        );
                    }}
                />
            </Table>
        </List>
    );
};
✳️ useShow() is a refine hook used to fetch a single record data. The queryResult has the response and also isLoading state.
Refer to the useShow documentation for detailed usage information. →
✳️ To retrieve the category title, again we need to make a call to /categories endpoint. This time we used useOne() hook to get a single record from another resource.
Refer to the useOne documentation for detailed usage information. →
useShow() is the preferred hook for fetching data from current resource. For query foreign resources you may use the low-level useOne() hook.
Since we've got access to raw data returning from useShow(), there is no restriction how it's displayed on your components. If you prefer presenting your content with a nicer wrapper, refine provides you
the <Show> component which has extra features like list and refresh buttons.
Refer to the <Show> documentation for detailed usage information. →
Editing a record
Until this point, we were basically working with read operations such as fetching and displaying data from resources. From now on, we are going to start creating and updating records by using refine.
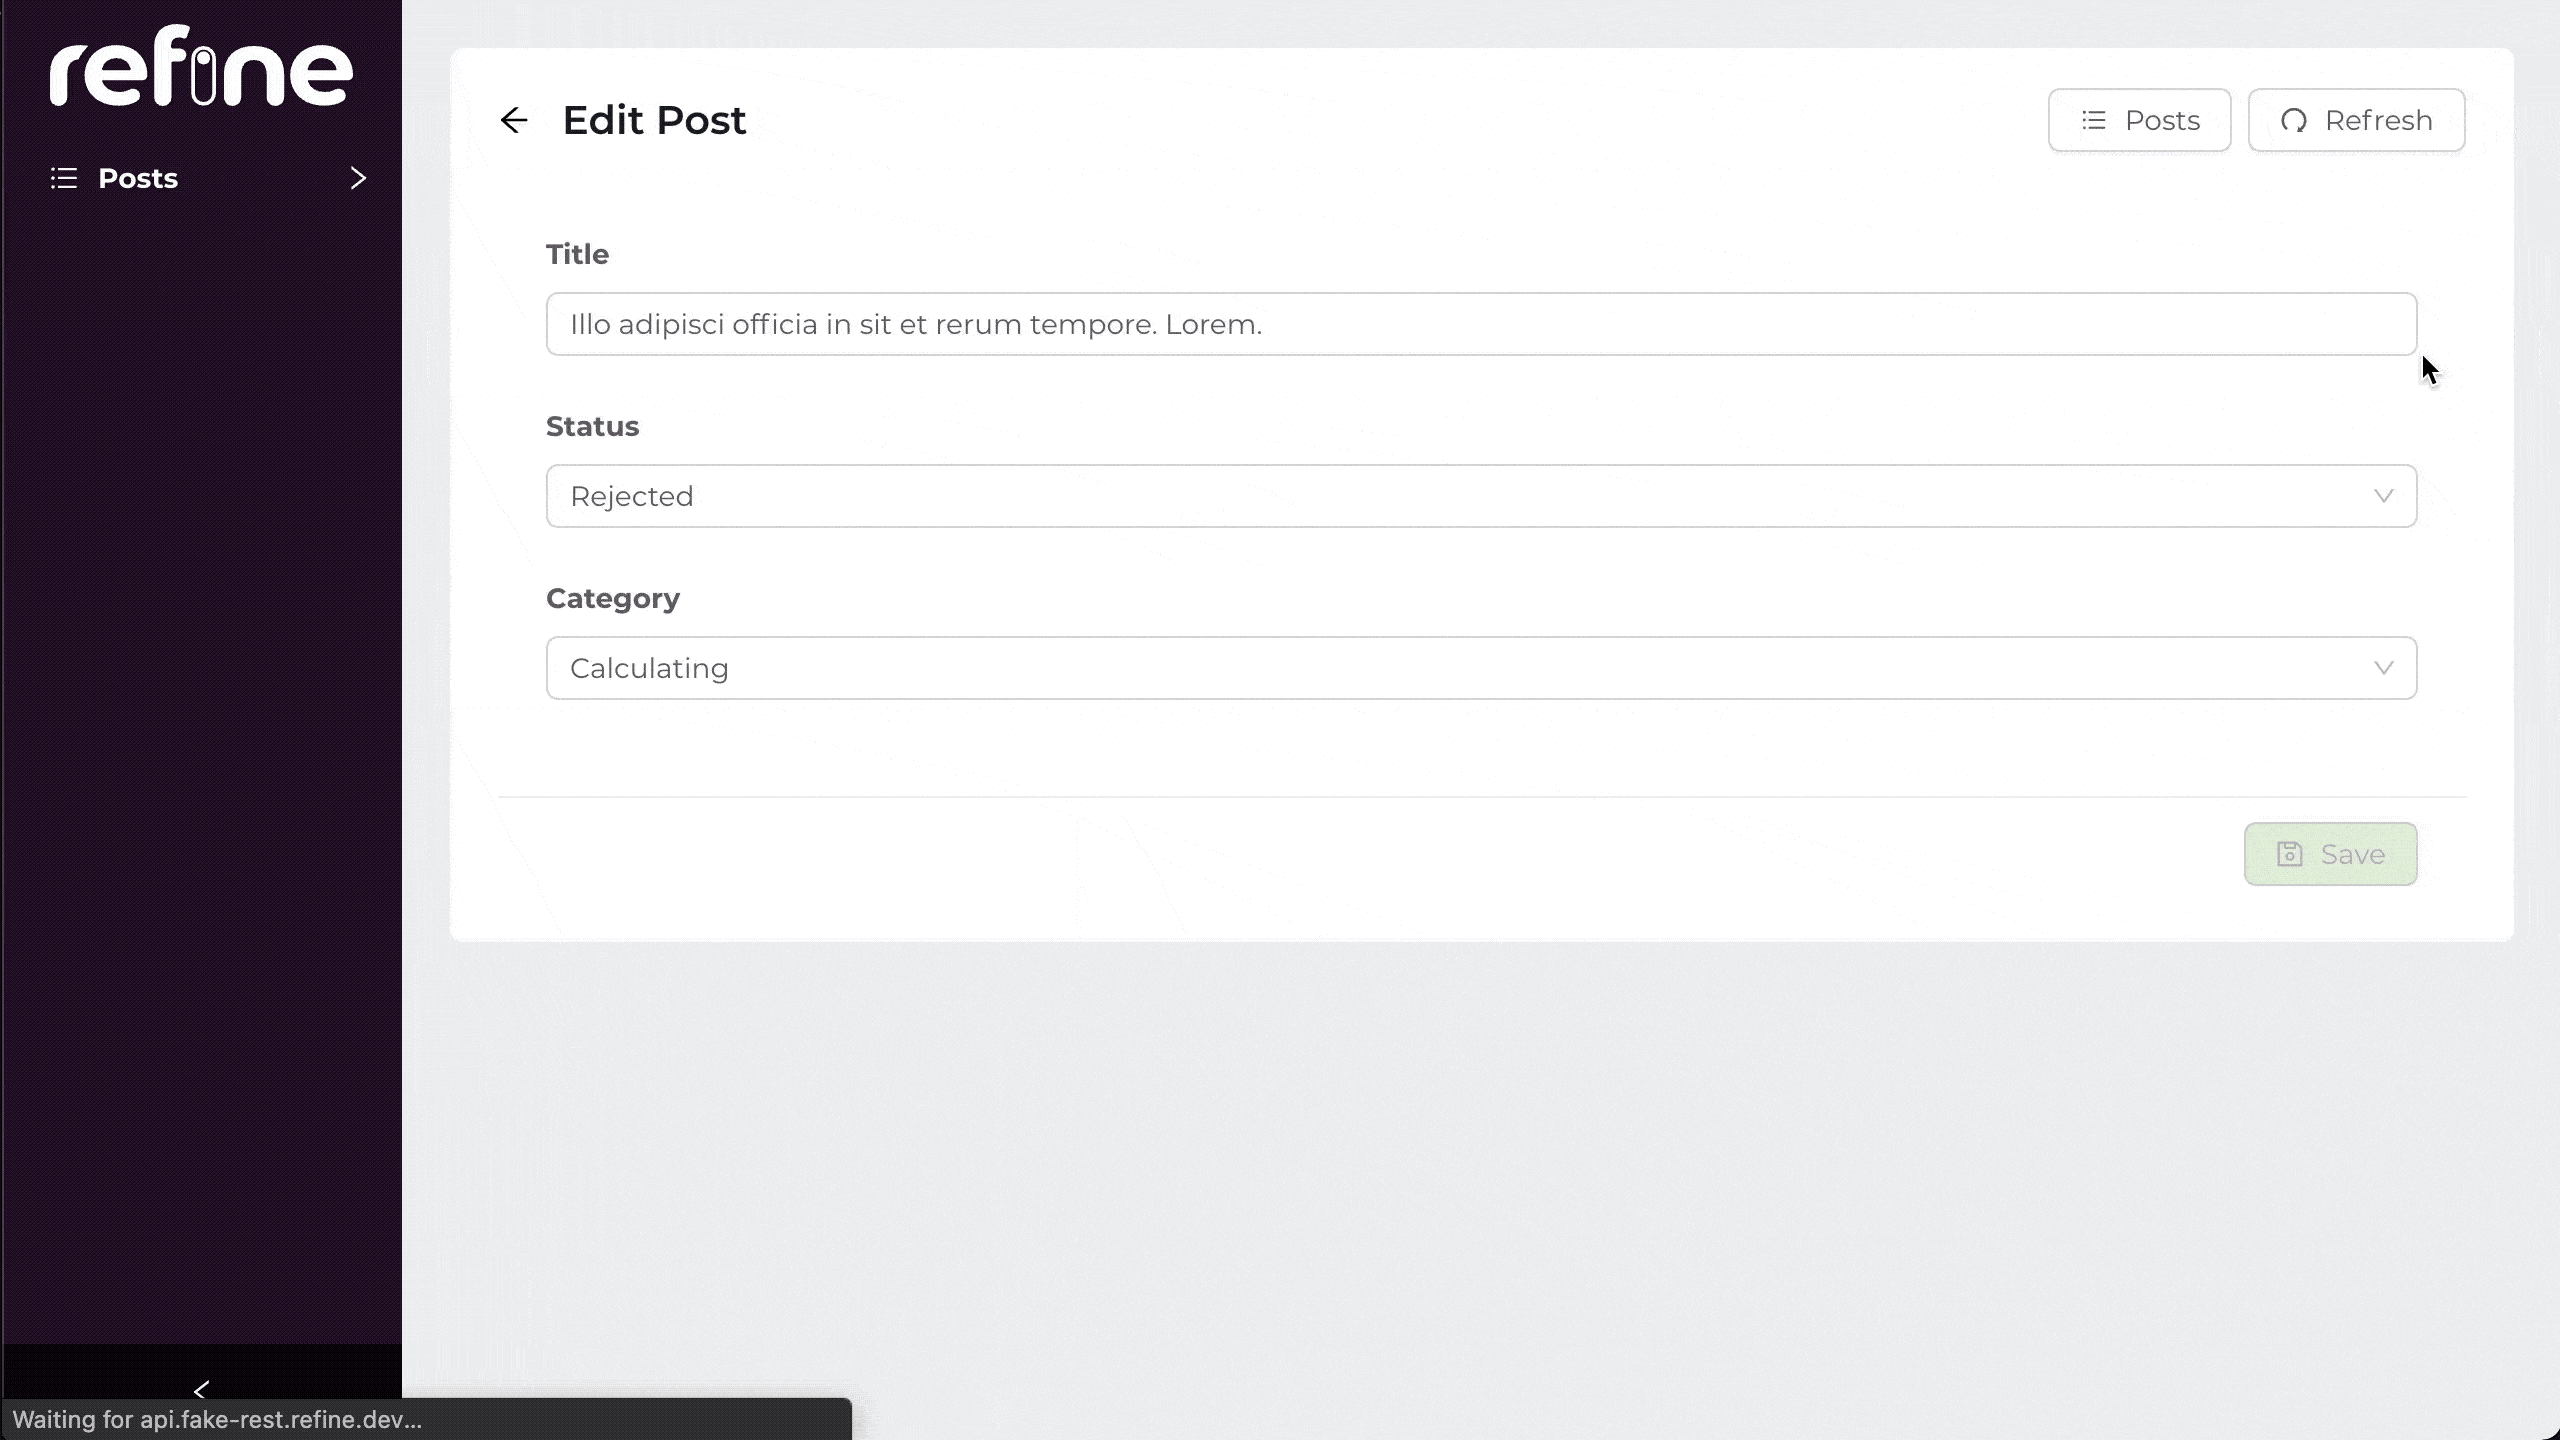
Let's start by creating a new <PostEdit> page responsible for editing a single record:
import { useForm, Form, Input, Select, Edit, useSelect } from "@pankod/refine";
import { IPost } from "interfaces";

export const PostEdit: React.FC = () => {
    const { formProps, saveButtonProps, queryResult } = useForm<IPost>();

    const { selectProps: categorySelectProps } = useSelect<IPost>({
        resource: "categories",
        defaultValue: queryResult?.data?.data?.category.id,
    });

    return (
        <Edit saveButtonProps={saveButtonProps}>
            <Form {...formProps} layout="vertical">
                <Form.Item label="Title" name="title">
                    <Input />
                </Form.Item>
                <Form.Item label="Status" name="status">
                    <Select
                        options={[
                            {
                                label: "Published",
                                value: "published",
                            },
                            {
                                label: "Draft",
                                value: "draft",
                            },
                            {
                                label: "Rejected",
                                value: "rejected",
                            },
                        ]}
                    />
                </Form.Item>
                <Form.Item label="Category" name={["category", "id"]}>
                    <Select {...categorySelectProps} />
                </Form.Item>
            </Form>
        </Edit>
    );
};
Now we can add the newly created component to our resource with edit prop:
import { Refine } from "@pankod/refine";
import routerProvider from "@pankod/refine-react-router";
import dataProvider from "@pankod/refine-simple-rest";

import { PostList, PostShow, PostEdit } from "./pages/posts";

export const App: React.FC = () => {
    return (
        <Refine
            routerProvider={routerProvider}
            dataProvider={dataProvider("https://api.fake-rest.refine.dev")}
            resources={[
                {
                    name: "posts",
                    list: PostList,
                    edit: PostEdit,
                    show: PostShow,
                },
            ]}
        />
    );
};
We are going to need an edit button on each row to diplay the <PostEdit> component. refine doesn't automatically add one, so we have to update our <PostList> component to add a <EditButton> for each record:
import {
    List,
    TextField,
    TagField,
    DateField,
    Table,
    useTable,
    useMany,
    FilterDropdown,
    Select,
    ShowButton,
    useSelect,
    Space,
    EditButton,
} from "@pankod/refine";

import { IPost, ICategory } from "interfaces";

export const PostList: React.FC = () => {
    const { tableProps } = useTable<IPost>();

    const categoryIds =
        tableProps?.dataSource?.map((item) => item.category.id) ?? [];
    const { data: categoriesData, isLoading } = useMany<ICategory>({
        resource: "categories",
        ids: categoryIds,
        queryOptions: {
            enabled: categoryIds.length > 0,
        },
    });

    const { selectProps: categorySelectProps } = useSelect<ICategory>({
        resource: "categories",
    });

    return (
        <List>
            <Table {...tableProps} rowKey="id">
                <Table.Column dataIndex="title" title="title" />
                <Table.Column
                    dataIndex="status"
                    title="status"
                    render={(value) => <TagField value={value} />}
                />
                <Table.Column
                    dataIndex="createdAt"
                    title="createdAt"
                    render={(value) => <DateField format="LLL" value={value} />}
                />
                <Table.Column
                    dataIndex={["category", "id"]}
                    title="category"
                    render={(value) => {
                        if (isLoading) {
                            return <TextField value="Loading..." />;
                        }

                        return (
                            <TextField
                                value={
                                    categoriesData?.data.find(
                                        (item) => item.id === value,
                                    )?.title
                                }
                            />
                        );
                    }}
                    filterDropdown={(props) => (
                        <FilterDropdown {...props}>
                            <Select
                                style={{ minWidth: 200 }}
                                mode="multiple"
                                placeholder="Select Category"
                                {...categorySelectProps}
                            />
                        </FilterDropdown>
                    )}
                />
                <Table.Column<IPost>
                    title="Actions"
                    dataIndex="actions"
                    render={(_text, record): React.ReactNode => {
                        return (
                            <Space>
                                <ShowButton
                                    size="small"
                                    recordItemId={record.id}
                                    hideText
                                />
                                <EditButton
                                    size="small"
                                    recordItemId={record.id}
                                    hideText
                                />
                            </Space>
                        );
                    }}
                />
            </Table>
        </List>
    );
};
Refer to the <EditButton> documentation for detailed usage information. →
You can try using edit buttons which will trigger the edit forms for each record, allowing you to update the record data.
Let's see what's going on our <PostEdit> component in detail:
✳️ useForm is a refine hook for handling form data.
On the example it returns formProps and saveButtonProps, where the former includes all necessary props to build the form and the latter has the ones for the save button.
In edit page, useForm hook initializes the form with current record values.
Refer to the useForm documentation for detailed usage information . →
✳️ <Form> and <Form.Item> are Ant Design components to build form inputs.
✳️ <Edit> is a wrapper refine component for <Form>. It provides save, delete and refresh buttons that can be used for form actions.
✳️ Form data is set automatically, whenever children inputs <Form.Item>'s are edited.
✳️ Save button submits the form by executing the useUpdate method provided by the dataProvider. After a succesfull response, the application will be redirected to the listing page.
Creating a record
Creating a record in refine follows a similar flow as editing records.
First, we'll create a <PostCreate> page:
import {
    Create,
    Form,
    Input,
    Select,
    useForm,
    useSelect,
} from "@pankod/refine";

import { IPost } from "interfaces";

export const PostCreate = () => {
    const { formProps, saveButtonProps } = useForm<IPost>();
    const { selectProps: categorySelectProps } = useSelect<IPost>({
        resource: "categories",
    });

    return (
        <Create saveButtonProps={saveButtonProps}>
            <Form {...formProps} layout="vertical">
                <Form.Item label="Title" name="title">
                    <Input />
                </Form.Item>
                <Form.Item label="Status" name="status">
                    <Select
                        options={[
                            {
                                label: "Published",
                                value: "published",
                            },
                            {
                                label: "Draft",
                                value: "draft",
                            },
                            {
                                label: "Rejected",
                                value: "rejected",
                            },
                        ]}
                    />
                </Form.Item>
                <Form.Item label="Category" name={["category", "id"]}>
                    <Select {...categorySelectProps} />
                </Form.Item>
            </Form>
        </Create>
    );
};
After creating the <PostCreate> component, add it to resource with create prop:
import { Refine } from "@pankod/refine";
import dataProvider from "@pankod/refine-simple-rest";
import routerProvider from "@pankod/refine-react-router";

import { PostList, PostShow, PostEdit, PostCreate } from "./pages/posts";

export const App: React.FC = () => {
    return (
        <Refine
            routerProvider={routerProvider}
            dataProvider={dataProvider("https://api.fake-rest.refine.dev")}
            resources={[
                {
                    name: "posts",
                    list: PostList,
                    show: PostShow,
                    edit: PostEdit,
                    create: PostCreate,
                },
            ]}
        />
    );
};
And that's it! Try it on browser and see if you can create new posts from scratch.
We should notice some minor differences from the edit example:
✳️ <Form> is wrapped with <Create> component.
✳️ Save button submits the form by executing the useCreate method provided by the dataProvider.
✳️ No defaultValue is passed to useSelect.
Deleting a record
Deleting a record can be done in two ways.
First way is adding an delete button on each row since refine doesn't automatically add one, so we have to update our <PostList> component to add a <DeleteButton> for each record:
import {
    List,
    TextField,
    TagField,
    DateField,
    Table,
    useTable,
    useMany,
    FilterDropdown,
    Select,
    ShowButton,
    useSelect,
    Space,
    EditButton,
    DeleteButton,
} from "@pankod/refine";

import { IPost, ICategory } from "../../interfaces";

export const PostList: React.FC = () => {
    const { tableProps } = useTable<IPost>();

    const categoryIds =
        tableProps?.dataSource?.map((item) => item.category.id) ?? [];
    const { data: categoriesData, isLoading } = useMany<ICategory>({
        resource: "categories",
        ids: categoryIds,
        queryOptions: {
            enabled: categoryIds.length > 0,
        },
    });

    const { selectProps: categorySelectProps } = useSelect<ICategory>({
        resource: "categories",
    });

    return (
        <List>
            <Table {...tableProps} rowKey="id">
                <Table.Column dataIndex="title" title="title" />
                <Table.Column
                    dataIndex="status"
                    title="status"
                    render={(value) => <TagField value={value} />}
                />
                <Table.Column
                    dataIndex="createdAt"
                    title="createdAt"
                    render={(value) => <DateField format="LLL" value={value} />}
                />
                <Table.Column
                    dataIndex={["category", "id"]}
                    title="category"
                    render={(value) => {
                        if (isLoading) {
                            return <TextField value="Loading..." />;
                        }

                        return (
                            <TextField
                                value={
                                    categoriesData?.data.find(
                                        (item) => item.id === value,
                                    )?.title
                                }
                            />
                        );
                    }}
                    filterDropdown={(props) => (
                        <FilterDropdown {...props}>
                            <Select
                                style={{ minWidth: 200 }}
                                mode="multiple"
                                placeholder="Select Category"
                                {...categorySelectProps}
                            />
                        </FilterDropdown>
                    )}
                />
                <Table.Column<IPost>
                    title="Actions"
                    dataIndex="actions"
                    render={(_text, record): React.ReactNode => {
                        return (
                            <Space>
                                <ShowButton
                                    size="small"
                                    recordItemId={record.id}
                                    hideText
                                />
                                <EditButton
                                    size="small"
                                    recordItemId={record.id}
                                    hideText
                                />
                                <DeleteButton
                                    size="small"
                                    recordItemId={record.id}
                                    hideText
                                />
                            </Space>
                        );
                    }}
                />
            </Table>
        </List>
    );
};
Refer to the <DeleteButton> documentation for detailed usage information. →
Now you can try deleting records yourself. Just click on the delete button of the record you want to delete and confirm.
The second way is showing delete button in <PostEdit> component. To show delete button in edit page, canDelete prop needs to be passed to resource object.
import { Refine, Resource } from "@pankod/refine";
import routerProvider from "@pankod/refine-react-router";
import dataProvider from "@pankod/refine-simple-rest";

import { PostList, PostShow, PostEdit, PostCreate } from "./pages/posts";

export const App: React.FC = () => {
    return (
        <Refine
            routerProvider={routerProvider}
            dataProvider={dataProvider("https://api.fake-rest.refine.dev")}
            resources={[
                {
                    name: "posts",
                    list: PostList,
                    show: PostShow,
                    edit: PostEdit,
                    create: PostCreate,
                    canDelete: true,
                },
            ]}
        />
    );
};
After adding canDelete prop, <DeleteButton> will appear in edit form.
Live Codesandbox Example
Our tutorial is complete. Below you'll find a live Codesandbox example displaying what we have done so far: